Some of Our Services

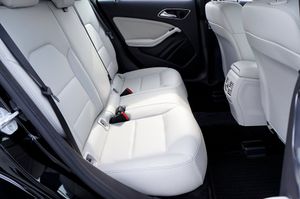
Interior detailing is the process of thoroughly cleaning and restoring the interior of a vehicle. This process involves a deep cleaning of every nook and cranny inside the car, from the seats and carpets to the dashboard and door panels. In this article, we will discuss the importance of cleaning your interior and the steps involved in the process.
Importance of Interior Detailing
Maintaining a clean and tidy interior is crucial for the overall health and hygiene of the passengers. Regular interior cleaning helps remove dirt, dust, and other harmful particles that can accumulate inside the car. Additionally, it helps to maintain the value of the vehicle by keeping the interior in good condition. A well-maintained interior can also enhance the driving experience by providing a comfortable and pleasant environment.
Steps in Interior Detailing
- Vacuuming: The first step is to thoroughly vacuum the entire interior of the vehicle. This includes the seats, carpets, and floor mats. A high-powered vacuum cleaner should be used to ensure that all dirt and debris are removed.
- Cleaning the Seats: The next step is to clean the seats. Depending on the material of the seats, different cleaning products may be required. Leather seats should be cleaned with a leather cleaner, while fabric seats can be cleaned with a fabric cleaner.
- Cleaning the Carpets: After cleaning the seats, the carpets should be given special attention. A carpet cleaner should be used to remove any stains or dirt that may be embedded in the carpet fibers. This will help to restore the carpet to its original color and texture.
- Cleaning the Dashboard and Door Panels: The dashboard and door panels should be wiped down with a microfiber cloth and a cleaning solution. This will help to remove any dust or grime that may have accumulated on the surfaces.
- Cleaning the Windows: Finally, the windows should be cleaned both inside and outside. A glass cleaner and a microfiber cloth can be used to remove any streaks or smudges on the glass.
Conclusion
Interior detailing is an essential part of maintaining a clean and healthy environment inside your vehicle. It helps to remove dirt, dust, and other harmful particles that can accumulate inside the car. By following these steps, you can restore your car's interior to its original condition and enhance your driving experience.

Exterior detailing is the process of cleaning and restoring the exterior of a vehicle. It involves a thorough cleaning of the car's exterior surfaces, including the paint, wheels, and windows. In this article, we will discuss the importance of caring for the exterior of your vehicle and the steps involved in the process.
Importance of Exterior Detailing
Maintaining a clean and well-maintained exterior is crucial for the overall health and appearance of the vehicle. Regular exterior washing, waxing, and polishing, helps to protect the car's paint and prevent damage from environmental factors such as sunlight, pollution, and road debris. It also helps to improve the car's appearance and value by removing dirt, grime, and other contaminants that can accumulate on the surface.
Steps in Exterior Detailing
- Washing the Car: The first step is to thoroughly wash the car. A high-quality car shampoo should be used to remove any dirt or grime from the surface of the paint. It is important to use a soft wash mitt or sponge to avoid scratching the surface of the paint.
- Cleaning the Wheels: After washing the car, the wheels should be given special attention. A wheel cleaner should be used to remove any brake dust or other contaminants that may have accumulated on the surface. A soft-bristled brush can be used to clean the spokes and other hard-to-reach areas.
- Drying the Car: Once the car has been washed and the wheels have been cleaned, it should be dried thoroughly. A microfiber towel can be used to gently dry the surface of the paint without scratching it.
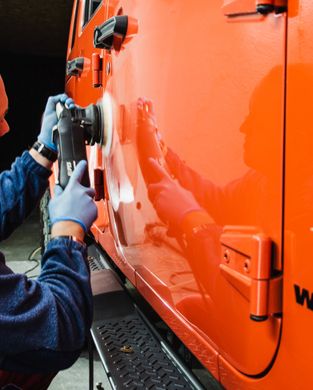
- Polishing the Paint: After the car has been dried, a polishing compound can be applied to the surface of the paint. This will help to remove any fine scratches or swirl marks that may be present. A polishing machine can be used to apply the compound evenly and efficiently.
- Waxing the Car: Finally, the car should be waxed to protect the paint and give it a shiny, glossy finish. A high-quality car wax can be applied to the surface of the paint using a soft foam applicator. After the wax has been applied, it should be buffed off using a clean, dry microfiber towel.
Conclusion
Keeping the exterior of your vehicle clean and protected, is an essential part of maintaining your transportation. It helps to protect the car's paint and prevent damage from environmental factors. By following these steps, you can restore your car's exterior to its original condition and enhance its appearance and value.

Car leather conditioning is an important part of maintaining the life and comfort of your leather covered components. It involves the use of specialized products to nourish and protect the leather surfaces inside the car. In this article, we will discuss the importance of leather conditioning and the steps involved in the process.
Importance of Leather Conditioning
Leather is a natural material that can become dry and brittle over time. Exposure to sunlight, heat, and other environmental factors can cause the leather to crack and fade. Leather conditioning is essential for maintaining the softness and suppleness of the leather, as well as protecting it from damage. Regular conditioning can also help to prevent stains and discoloration, and prolong the life of the leather surfaces inside the car.
Steps in Leather Conditioning
- Cleaning the Leather: The first step in leather conditioning is to thoroughly clean the leather surfaces inside the car. A leather cleaner should be used to remove any dirt, dust, or grime that may have accumulated on the surface. It is important to choose a cleaner that is specifically designed for use on leather, as other types of cleaners can damage the material.
- Applying the Conditioner: Once the leather surfaces have been cleaned, a leather conditioner can be applied. The conditioner should be chosen based on the type of leather in the car. A conditioner that contains natural oils and waxes can help to nourish and protect the leather, while also restoring its natural shine.
- Applying the Conditioner: The conditioner should be applied evenly to the leather surface using a soft cloth or applicator pad. It is important to work the conditioner into the leather, making sure to cover all areas. The conditioner should be left on the leather for the recommended time, typically 10-15 minutes.
- Buffing the Leather: After the conditioner has been left on the leather for the recommended time, it should be buffed off using a soft, dry cloth. This will help to remove any excess conditioner and restore the shine of the leather.
- Repeating the Process: Depending on the condition of the leather, it may be necessary to repeat the conditioning process several times. This will help to fully nourish and protect the leather, and ensure that it remains soft and supple for years to come.
Conclusion
Leather conditioning is an essential part of maintaining the interior of a car. It helps to protect the leather surfaces from damage, and keep them looking soft and supple. By following these steps, you can ensure that the leather surfaces inside your car remain in top condition for years to come.

Carpet and upholstery shampooing is an important part of maintaining your vehicle. It involves the use of specialized products to deep clean and restore the carpets and upholstery inside the car. In this article, we will discuss the importance of carpet and upholstery shampooing and the steps involved in the process.
Importance of Carpet and Upholstery Shampooing
Over time, the carpets and upholstery inside a car can become stained and discolored. Dirt, dust, and other contaminants can accumulate on the surface, making it look dull and dirty. Carpet and upholstery shampooing is essential for removing these stains and restoring the original color and texture of the fabrics. Regular shampooing can also help to prolong the life of the carpets and upholstery, and maintain the overall cleanliness and appearance of the interior.
Steps in Carpet and Upholstery Shampooing
- Vacuuming: The first step in carpet and upholstery shampooing is to thoroughly vacuum the carpets and upholstery to remove any loose dirt or debris. A high-powered vacuum cleaner should be used to ensure that all areas are thoroughly cleaned.
- Pre-treatment: After vacuuming, a pre-treatment solution can be applied to the carpets and upholstery to help loosen any stubborn stains. The solution should be allowed to sit for several minutes to ensure that it penetrates deep into the fibers.
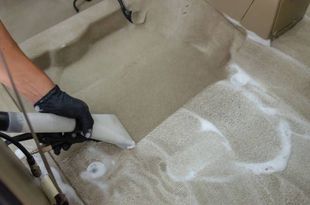
- Shampooing: Once the pre-treatment has been applied, a specialized carpet and upholstery shampoo can be used to deep clean the surfaces. The shampoo should be applied evenly to the surface, using a soft brush or applicator pad to work it into the fibers.
- Extraction: After the shampoo has been applied, a high-powered extractor should be used to remove the shampoo and any dirt or grime from the carpets and upholstery. The extractor uses a combination of hot water and suction to remove the solution and leave the surfaces clean and dry.
- Drying: After the extraction process is complete, the carpets and upholstery should be allowed to dry thoroughly. A high-powered fan or dehumidifier can be used to speed up the drying process and ensure that all moisture is removed from the surfaces.
Conclusion
Carpet and upholstery shampooing is an essential part of maintaining the interior of a car. It helps to remove stains, restore the original color and texture of the fabrics, and prolong the life of the carpets and upholstery. By following these steps, you can ensure that the interior of your car remains clean, fresh, and well-maintained for years to come.

Paint correction and protection is an important part of correcting the finish of your paint and returning to that deep glossy shine. It involves the use of specialized products and techniques to restore and protect the paint surface of the car. In this article, we will discuss the importance of paint correction and protection and the steps involved in the process.
Importance of Paint Correction and Protection
Over time, the paint surface of a car can become faded, scratched, and damaged. Exposure to sunlight, environmental contaminants, and regular wear and tear can all take a toll on the paint. Paint correction is essential for restoring the shine and smoothness of the paint surface, while paint protection helps to prevent further damage and maintain the appearance of the car.
Steps in Paint Correction and Protection
- Washing the Car: The first step in paint correction and protection is to thoroughly wash the car to remove any dirt or grime that may be on the surface. A specialized car shampoo should be used to avoid damaging the paint surface.
- Decontamination: After washing, a clay bar can be used to remove any embedded contaminants on the surface. The clay bar should be used in combination with a lubricant to avoid scratching the paint.
- Paint Correction: Once the surface is clean and decontaminated, paint correction can be performed to remove any scratches or imperfections on the surface. This involves the use of a specialized polishing compound and a buffer to gently remove a thin layer of the clear coat and reveal a smooth, shiny surface.
- Paint Protection: After paint correction, a specialized paint protection product can be applied to the surface to protect the paint from further damage. This can include a wax, sealant, or ceramic coating, which will help to repel water, protect against UV rays, and provide a barrier against contaminants.
- Final Touches: After the paint protection product is applied, the surface can be buffed to a high shine, and any remaining residue can be removed with a soft cloth.
Conclusion
Auto paint correction and protection are essential for maintaining the appearance of a car's exterior. By following these steps, you can restore the shine and smoothness of the paint surface, protect it from further damage, and maintain the appearance of your car for years to come.

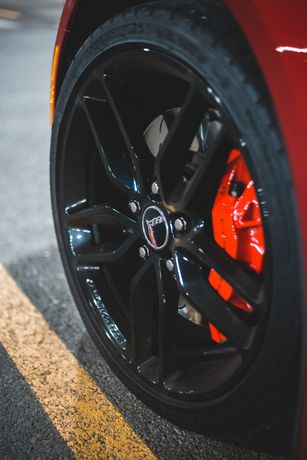
Keeping your shoes clean is important to the overall appearance of your vehicle. If you were to put on your best outfit then wear your old dirty work boots with it, more than likely you will draw negative attention. But having clean shoes with a clean outfit, will definitely turn heads. It involves the use of specialized products and techniques to clean and restore the wheels of the car, which can become dirty and discolored over time. In this article, we will discuss the importance of taking care of your wheels and the steps involved in the process.
Importance of Wheel Detailing
The wheels of a car are constantly exposed to dirt, grime, and environmental contaminants, which can cause them to become discolored and lose their shine. Deep wheel cleaning is essential for removing this buildup and restoring the appearance of the wheels. In addition to improving the appearance of the wheels, this can also help to prolong their lifespan and prevent corrosion.
Steps in Wheel Detailing
- Washing the Wheels: The first step is to thoroughly wash the wheels to remove any loose dirt or grime. A high-pressure hose or power washer can be used to remove any stubborn dirt.
- Decontamination: After washing, a specialized wheel cleaner can be used to remove any embedded contaminants, such as brake dust or tar. The cleaner should be allowed to sit for several minutes to ensure that it penetrates the surface.
- Brushing: Once the cleaner has been applied, a specialized wheel brush should be used to scrub the surface of the wheels. The brush should be soft enough to avoid scratching the surface but firm enough to remove any stubborn buildup.
- Polishing: After brushing, a specialized wheel polishing product can be used to restore the shine of the wheels. The polish should be applied evenly to the surface, using a soft cloth or applicator pad to work it into the surface.
- Protecting: After polishing, a specialized wheel protectant can be applied to the surface to protect against further damage and maintain the appearance of the wheels. The protectant can be applied using a soft cloth or applicator pad, and should be allowed to dry before driving.
Conclusion
This process is an essential part of maintaining the appearance of a car's exterior. By following these steps, you can remove any dirt or grime buildup, restore the shine of the wheels, and protect them against further damage. With regular maintenance, your wheels will remain in pristine condition for years to come.

Removing pet hair from your vehicle can be a specialized service requiring professional techniques and tools. Furry family hair can be a real problem for car owners, especially those who travel with their furry family frequently. The hair can get embedded in the upholstery, carpets, and other crevices, making it challenging to remove using regular cleaning methods.
Importance of Pet Hair Removal
Pet hair removal can be a tough removal process without the right tools for the job. Pet hair can accumulate quickly in a vehicle, and if not addressed promptly, it can become embedded in the upholstery and carpets, making it difficult to remove. This not only affects the appearance of the car but can also lead to unpleasant odors and allergies.
Some Services Pet Hair Removal:
- Thorough Vacuuming: The first step in pet hair removal is a thorough vacuuming of the entire car. A high-powered vacuum cleaner is used to remove pet hair and other debris from the carpets, upholstery, and other areas of the car's interior. The vacuum cleaner has special attachments, which is specially designed to remove pet hair from the upholstery and carpets.
- Brushing and Scrubbing: A specialist will use specialized brushes and scrubs to remove pet hair from the hard-to-reach areas of the car's interior. These areas include the floor mats, floor, seats, dashboard, vents, console, cargo area, and door panels.
- Shampooing and Steam Cleaning: After hair removal and vacuuming, the next step is to shampoo and steam clean the carpets and upholstery. This process not only completes the removal of pet hair but also eliminates any odors and stains caused by pet accidents.
- Air Purification: After cleaning, the air purification process is performed to eliminate any lingering odors and allergens caused by pet hair and dander. This process involves using an air purifier to clean the air inside the car.
- Leather Conditioning: If your car has leather seats, they need to be properly conditioned to prevent drying and cracking.
Conclusion
Furry family hair removal is a specialized service that can help car owners maintain a clean and hygienic interior, even when traveling with pets. It involves a combination of vacuuming, shampooing, steam cleaning, brushing, scrubbing, air purification, and leather conditioning. A specialist will use specialized tools and techniques to remove pet hair and other debris from all areas of the car's interior, leaving it fresh and clean.
All Rights Reserved | Warriors Detailing, LLC
